
KC 296 – Turchetta (Porchetta-style Turkey)

Why hello there, and welcome back to Kitchen Catastrophe, where it never rains but it pours (seriously, I think it’s rained for the last 2 weeks straight at my house) and we’re a little late this week, but I assure you it was for a theoretical good cause. Today I’m pulling out a smaller entrée option for the upcoming holiday, in case you’re still unable to celebrate with as many people as you normally would. If you want to skip the details and entrails, and get straight to the recipe, here’s a link. For everyone else, let’s dig in. (Oh, wait, actually, quick warning: this is a SUPER meat-focused post. Like, that’s not something I normally warn people about, but I personally went “eww” after writing out one of the descriptions, so I think vegans or vegetarians might be even more grossed out. Just keep that in mind if you keep reading.)
I Have Already Offended 3,648 Italians
So, what are we making? “Tuchetta” (pronounced “tur-keht-ta”, because in Italian, ch makes the K sound, and C makes the ‘ch’ sound...if in front of an e or i. Look, languages are weird.), a riff on PORCHETTA, a long-standing traditional Italian dish consisting of, at its most elaborate/fancy, an entire pig, boned and gutted, the meat heavily seasoned, and then rolled back onto itself to roast in its own skin. On description I’ve seen describes how, by leaving the head on, the roast looks like a pig tucked into a sleeping bag…where the sleeping bag is its own skin.

I couldn’t find any of those, so enjoy this head-less sleeping bags. With potatoes on the bottom, because the hell if we’re wasting pork fat!
I assure you, there’s a very good reason for this somewhat grim methodology, and it’s actually quite in tune with some of the topics we covered in the Korean Pork Belly Rhapsody post, which I will get to in a second. First, some word nerd time: Porchetta is Italian for “Pork-ette” in one of the most obvious etymologies we’ve ever had to cover. If you want to get technical, it’s the “feminine diminutive” of Pork; while in English, we typically use ‘-ette’ as EITHER a diminutive (A “kitchenette” is a little kitchen) OR as a designator of femininity (A bachelorette is a female bachelor.) Whereas in French/Spanish/Italian, it serves kind of as both (in that the languages have innate gender, so things have to be ‘male’ or ‘female’.) And it’s most often eaten…as a sandwich.
See, the thing about porchetta is that it’s a festival food: much like how in KPBR they talk about killing pigs for important events, and having to use ALL the meat, fat, and other parts. Porchetta evolved as a way to celebrate with a whole pig without much waste. Indeed, a sister dish, cicotto, consisted of the tripe, trotters, pig’s ears, tongue and other meats not used in the pochetta itself, stewed as the porchetta roasted, sometimes literally BENEATH the porchetta, allowing the rendering fat of the roast to fall down and season the mixture. It’s an attempt at frugality through festivity. This idea was then expanded on and added to, as the market industrialized, so that slices of smaller porchetta roasts, tucked into a bun, are a classic central Italian street food and festival snack, much like an American might think of a Hot Dog. It’s rooted in Central Italy, though there are some prominent variations, and it’s now eaten all over Italy.
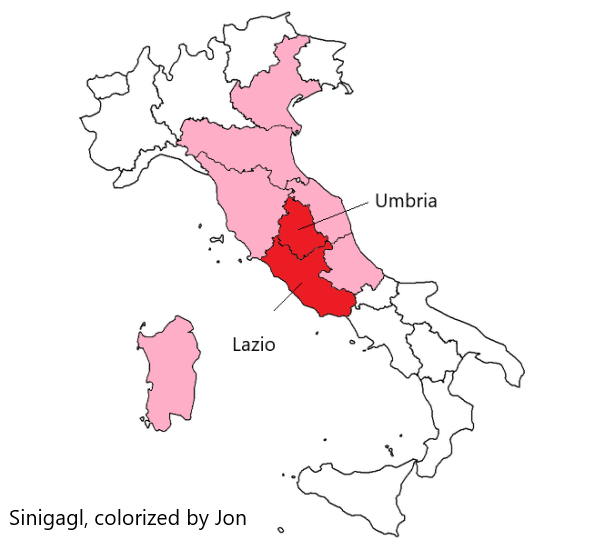
I spent a frustrating amount of time looking for a blank map that I could spend 30 seconds in Paint “colorizing” so I could reference like, 4 places without people being confused.
And there is a TON of debate about how to make it. The two deep-red regions in the map I just posted are viewed as the “birth-place” of the dish, with a specific small town in Lazio being most connected with the dish. However, every PINK region is known for either having a particular variation of the dish, or being early adopters of the trend. The BASICS are that most regions agree that you need salt, garlic, and some kind of herb for the flavoring paste: in Umbria, that’s wild fennel pollen. In Abruzzo (the pink region to the bottom right), they prefer rosemary. In Lazio, they often keep the liver as part of the roast, to add its flavor to the mixture, while other areas remove it, and still others include a mixture of offal.
Of course, in the modern era, these differences are fading somewhat: You can go to the SAME festival and find all the different varieties served at different carts. Many use a cut that combines the loins and belly, creating the more common “burrito” shape of porchetta rather than the old-school pig-in-a-blanket. Further, in Umbria, they’ve been experimenting with the phrase “in porchetta” to refer to ANY type of meat prepared the way porchetta is prepared: a boneless piece of meat rolled in herbs and garlic and roasted, or stuffed with a flavorful paste. You can find beef, rabbit, or even CARP in porchetta. So in that regard, what we’re doing today isn’t so weird: it’s simply “Turkey in Porchetta”. But of course, I said the name wrong, hence the thousands of angry Italians I will have to mollify later.

Yes, my Italian friends! How about that Checco Zalone, eh?
Why Make the Attempt?
Before we get into the making of the dish itself (which is a frustrating combination of “pretty straightforward” and “confusing and opaque”), I wanted to touch a little more on why exactly I wanted to try this recipe. These are confusing and trying times for us all. Many of us are worried about gathering with family even now. Many have lost beloved members that they would normally share the meal with. And with all the supply chain issues, it will likely be a struggle for many families to put their classic comfort foods on display. Hell, I specifically chose this recipe because it used less than the normal recipe, and then was unable to find just a turkey breast at the three stores I checked.

I know objectively that one of the big issues of the supply chain problem is a lack of truckers, which hurts both international and local shipping, but since the main images are the international shipping vessels waiting offshore, I do have to admit I’m vaguely suspicious this bin is empty because Wal-mart can’t ship turkeys from China fast enough.
While some may find comfort in continuing the traditions without the people (whether due to temporary or tragically permanent separation), others may find that the memories are too fresh. So here’s an option that is (hopefully) different enough that it doesn’t trigger those still-tender wounds, while being familiar enough to feel appropriate. And hey, it’s a confusing mess, as I said, and something new, so you can use that to distract yourself!
Lastly, one more advantage of the dish is the make-ahead potential: while there’s a fair amount of hands-on work, it can be done the night before, the day before, or even 2 days before, so all you have to do the day off is baste with butter and roast for a couple hours, letting you worry about other things or connect with the people you can be with this year.
Cool? Cool.
Breaking Down the Bird
Now, technically, as I’ve said to several people while describing this, you could choose to see this as a recipe with about 4 steps. OR you could see it as a recipe with 9 steps. The difference is how many steps you turn “breakdown the bird” into. Because in order, this recipe is: Make paste, breakdown and rebuild bird tube, chill, roast. The problem is that step 2 is a BUNCH of steps on its own. I took this recipe from Cook’s Illustrated, which had a visual breakdown for it all, and I’m going to try to replicate the main pieces of it here for you guys. (I know that link goes to a paywall, but I’m really just citing my source, since I didn’t want to take a picture of the drawn pictures of the magazine.)
The FIRST thing you need to do is, if you didn’t buy fresh turkey breast, is appropriately thaw it: you’ll notice partway through the pictures that the quality of light changes: the whole thing gets a little brighter. That’s because, after I took that picture at Wal-Mart from earlier, I gave up on finding the turkey breast, and was going to try and throw together a different recipe, but my mother found some at the FOURTH grocery store in town Saturday morning. But despite thawing for over 7 hours on Saturday, when we want to break it down, we discovered it was still frozen close to the bone, so we had to give up after a couple steps, and come back on Sunday morning. Try and avoid that kind of nonsense if/when you cook this, eh?
Step one is make a nice herbal paste to rub on the turkey chunks, consisting of ground fennel seed, black pepper, salt, garlic, sage, rosemary, thyme, and olive oil. This is a little bit of an irritating step, since you’re going to use a spice grinder to process the fennel seed and pepper, and chop up the sage and rosemary, before tossing it all into a food processor to become paste.

Shown poorly here, because I thought I had other shots, but we kept juggling who was taking pictures, and who had hands with raw turkey juices on them.
You can set that aside as you prep the bird, or have someone else working on it as you do the whole deboning and reorganizing thing. You’ll ALSO want to pre-cut some butcher’s twine, but that can technically wait if you’d rather do it as a brief break from deboning. (“A brief break from de boning” is also what gangster take when drinking on their honeymoon”)
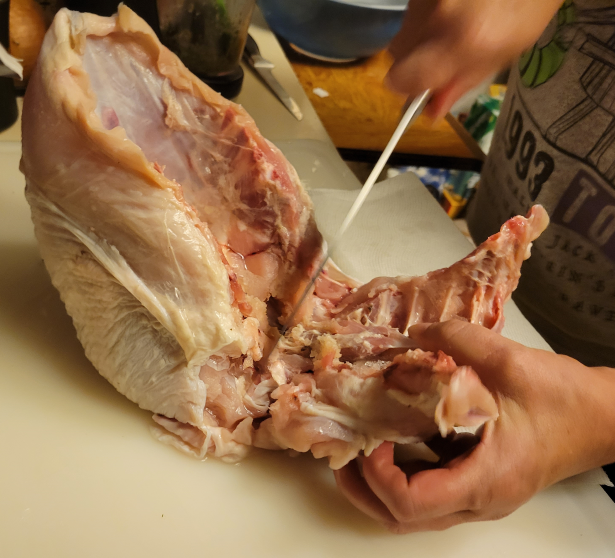
Speaking of (deboning, not de boning): we’re not actually using the WHOLE breast. Specifically, while we bought a whole bone-in breast, that was so we could be sure we had enough skin, breast meat, and tenderloins. We don’t actually WANT the bones, so we’re going to have to debone it. You start by cutting through the ribs to remove the backbone: there’s going to be a visible crease/line on sides near the spine. That’s where you cut.

Subtly indicated in this picture with some refined Paint lines.
Cut to the wing joints. Once there, set aside the kitchen shears, and pry the now-mostly loose back up and away from the turkey, to expose the wing joints themselves. You can deftly cut through the joints with a paring knife, OR, if you’re dealing with a lot of frozen meat like we were, you can resort to more drastic measures.
Note to self: remember that Cleavers are only visually impactful if you can see the sheet of metal that forms the blade. Shot from above, they don’t look different than normal knives, RUINING THE JOKE.
Flip the whole thing back over, and working somewhat gently, pry the skin off of the breast in one cohesive sheet. This is going to be the exterior cover of the roast, so if there’s holes, you’re going to be leaking juices. Now, you’re going to actually ‘carve’ the turkey, using the tip of a knife to cut right next to the ribs, allowing you to cut off both halves of the breast. I have no pictures of this process, because we couldn’t tell what was bone and what was ice when we gave up Saturday evening, and when I got up Sunday morning, I found they’d done literally JUST this one-half of a step while I was asleep. (I also just remembered they took pictures on another phone that I could have downloaded but it’s FAR too late for that now.) Assuming you DON’T have that problem, you can take the remaining rib bones along with the back you pried off earlier and either throw them away, or freeze them to make turkey stock later. At least on ours, there was a fair amount of good meat/fat on the spine that we didn’t want to waste.
From there, you want to peel off the tenderloins from the breast. In our experience/with our breast, there was an extra layer of meat between the tenderloin and the breast proper, which we couldn’t tell whether it was supposed to be one or the other, so we also pulled it off the breast and treated it as half of the tenderloin
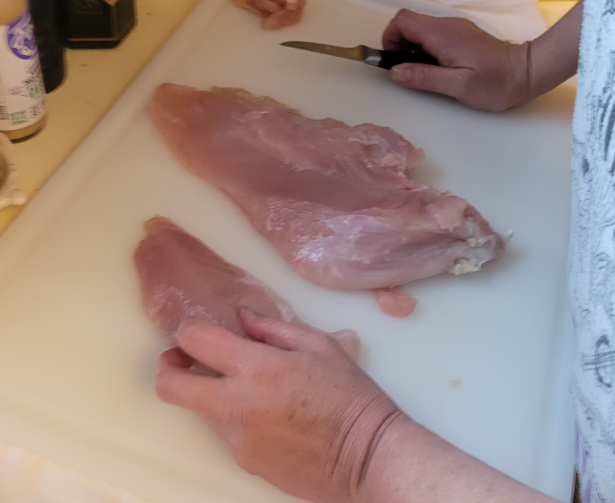
This is mostly how it SHOULD look. We pulled the left chunk off of the right, and trimmed the edge.
Then, you’re going to butterfly the turkey breast. This is hard to explain, but pretty easy to do: basically, we want to convert the breast into one (roughly) even thickness, by cutting back the top part, and folding it away. So slap the breast with the flat side down, and about halfway across the breast, cut so you can fold the top half away: the pieces should still be joined.
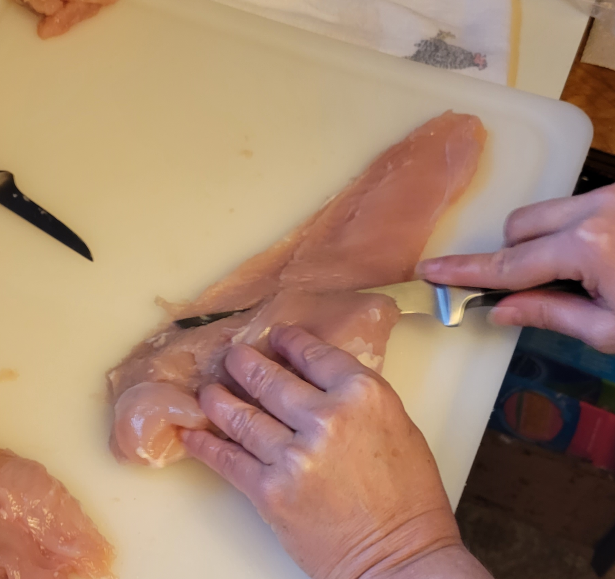
This is how the process STARTS, because, again, I take the pictures, then write the post THINKING I remember what pictures I’ve taken, and then live with my shame when I’m wrong.
Once you’ve done that to both breasts, you toss all the meat into a bowl and massage it with the spice paste to evenly coat. Also take a moment to clean your cutting board/work surface, because you want it to be dry for the next step. Take your skin, pat the exterior dry, and lay it dry-side down. If there’s any visible fat, you should trim that away. THEN, lay out your paste-covered meat slabs: one of the breasts, butterflied segment toward the middle, then the other on the far side, and fill in the gap with the tenderloins, trying to lay them so the meat layer is of relatively even thickness.
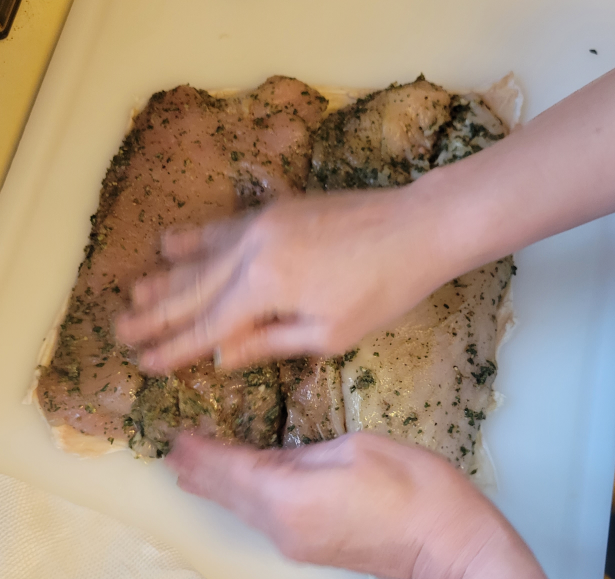
If you’re thinking “Jon, I can’t see the skin”, you’re not alone!
Now, this LOOKS like it’s not going to work, right? There’s BARELY enough skin to lay all the meat out on, and now we’ve got to roll it closed? But that’s okay: neither ours, nor the professional video I watched from Cook’s Illustrated looked like it would work either, and yet both did: On Cook’s country, the ‘roll’ was more of a “flop” at first, and the whole ensemble was surprisingly loose, while we went for more of a “tight sleeping bag” roll we’d picked up from Scouting. The advantage to their method Is that it can be done alone, while ours looks a little more “professional” as you tie it closed with the lengths of twine you definitely cut earlier

As noted, you may need help with this step, unless you’re Goro.
Once the first loop or two of twine is on, you can move your grip to pincing the gap between the edges of the skin closed as you tighten a length of twine around it and tie it closed. After about 7 loops, you should be able to move on to a perpendicular one: take a length of twine about twice as long as the others, tie it to one end of the roast, and run it across the turkey, looping under and around every length of twine you hit, until you get to the other end of the roast. Flip the roast and continue on the other sides, continuing until you have to flip again, tying off the length next to where it started, creating one continuous run of twine around the whole roast. At this point, my mother took two more pieces of twine, and used them as a cross-tie for the ends, so that we could enclose our turchetta burrito style, but it’s also fine to leave them more splayed out.
This looks like a slug got into shibari. A word you SHOULD NOT Google unless you’re at home and not near or are a child.
Sprinkle with salt, and place on a greased baking or roasting rack in a roasting pan lined with crumpled aluminum foil, which will catch the rendering fat and keep it from burning and smoking as you roast the turchetta. A step we DEFINITELY DID NOT FORGET, because no one took my “we need to prep the roasting pan” instruction seriously the three times I said it before we all forgot and now I’m going to be blamed when this makes too much smoke.
Pop in the fridge for at least 8 hours, and up to 2 days: you want the salted spice paste to season the meat, hence the minimum time-frame. Also, the salted skin in the cold refrigerator will help dry out the skin, allowing it to crisp better in the oven.
Baste, Bake, and Binge
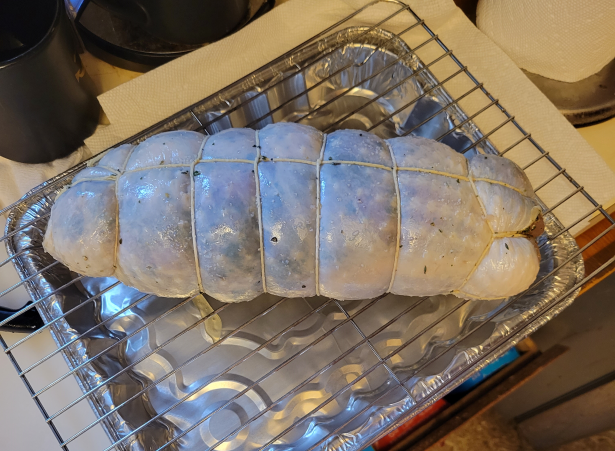
On the day of, pre-heat your oven to 275, brush your turchetta with butter, and pop it in to slowly roast at a low temp for a little under 2 hours. Traditionally, you’d roast a ‘real’ porchetta for 8 or more hours, but A: pigs aren’t turkey. (That’s important, write that down.) and B: we’re working with about 4-5 pounds of meat, not 40-50. After that time, it’ll look like this:

Anyone who understood our last caption and I are having a very inappropriate laugh/are wincing in pain at this image.
For everyone else: Now THAT’S a Butterball! (that joke will make sense in like, 3 paragraphs)
Take it out, preheat the oven to FIVE HUNDRED degrees, and cut the twine off. Where we’re going, we don’t want flammables. Specifically, we’re about to blast this sucker at high heat for 15-20 minutes to get that skin nice and browned and crisp, so we do NOT want twine catching fire as we do that. Let it rip, and once it’s nice and browned and it reads 145 in the center, pull it to rest on the counter for 30 minutes. This resting period will let it redistribute its juices, and let it climb up to the safe temp of 160, as the super-heated skin bleeds heat into the middle of the meat. Once ready, slice it up and serve.

A lot of people talk about fat-marbling in meat, but honestly: Marble lines are normally DARKER than the rest of the stone. THIS looks like “marbled meat”, damn it.
The results were regarded as quite good by my family. Nate in particular noted that he thought he wouldn’t like the flavor of the paste, but that it was quite nice. My mother thought it was a little salty, but A: she thinks MOST things are salty, and B: since we used a pre-brined turkey-breast, that’s probably our fault for not reducing the salt in the flavor paste. (It says if using a specific kind of Butterball to reduce the salt, so we considered doing so…and then forgot when it came time to make the paste and added the salt anyway.) My mother thinks it’s maybe not worth it for the effort put in, which is certainly a valid take, though I think our version FELT like more effort because of the aforementioned thawing incident, and because we keep our refrigerators perpetually full, so it’s hard to make space to chill something that large. The magazine says that it’ll make great left-overs as a meat for sandwiches, and everyone had 2-3 thick slices, so I’m calling it a rousing success. If you can find it, and want to try something new for this Thanksgiving (or want something kind of fancy for a Sunday night between Thanksgiving and Christmas), I’d say give it a shot.
THURSDAY: I THINK I’M GOING TO TALK ABOUT HOW SPECIAL MY FAMILY IS, AND HOW YOU CAN BE LIKE US.
MONDAY: WE’RE TRYING TO DECONSTRUCT A DELICIOUS DISH FROM A NEW PLACE WE LOVE, AND GIVE YOU A SENSATIONAL SIDE FOR THANKSGIVING.
Here's the
Recipe
Turchetta (or “Turkey in Porchetta”)
Serves 6-8
Ingredients
Spice Paste
1 tbsp fennel seeds
2 tsps black peppercorns
¼ cup fresh rosemary leaves, chopped
¼ cup fresh sage leaves, chopped
¼ cup fresh thyme leaves
6 garlic cloves, chopped
4 tsps kosher salt*
3 tablespoons extra-virgin olive oil
The Meat
2 tsps kosher salt*
1 (7- to 8-pound) bone-in turkey breast
2 tablespoons unsalted butter, melted
* - If using Diamond brand. Morton is denser, so reduce to 1 tbsp and 1.5 tsps
Preparation
Prep your tools: cut 7 lengths of butcher’s twine at 16”, and one at 30”. Crumple up a sheet of aluminum foil and uncrumple to cover the bottom of a roasting pan. Grease the rack for the pan, and place on top of the foil. Make the spice paste, by grinding fennel seed and peppercorns to a fine powder, either in a spice grinder or mortar and pestle. Add with all paste ingredients except olive oil to food processor, and pulse around 15 times. Add oil, and process for another 20-30 seconds, until a paste has formed.
Debone and deconstruct the turkey: Cut through the ribs of the turkey at the vertical line where the breast meets the ribs using kitchen shears until you reach the wing joints. Pry back the spine to pop the shoulder joints. Using a paring knife, cut through the joints and meat to remove the back entirely. Set aside if desired for stock, or discard. Starting at the tapered point of the breast, work the skin off of the breast, and set aside. Using the tip of the knife, carve the breast meat from the bones in two large chunks. Flip the breasts, and pull off tenderloins, trimming white tendon line after removed.
Butterfly the breasts, laying flat side down, and cutting into raised portion of meat at about half-way down the breast, stopping 1/2” from the end of the breast, and folding out, so the breast is one large unit of roughly even thickness. Toss the tenderloins and breasts in a large bowl with the spice paste.
Reconstruct the “turkey tube”: Pat the exterior of the skin dry, and lay flat on a work surface. Trim any loose pieces of fat. Lay the turkey on top of the skin, starting with one breast, with the butterflied portion on one end, the other breast on the other edge, with the butterflied portion on the OTHER end, and lay the tenderloins in between the two breasts, with the tapered ends overlapping. Roll up, using the skin to force the meat together, and tie shut with one 16” length of twine, about 2” from the end. Repeat on the other end, pinching skin closed as you tighten twine. Tie tube closed along entire length, using remaining 5 pieces of 16” twine. Tie 30” length to twine at one end of tube, and run along top and bottom of tube, looping under and around every intersection with other pieces of twine, ending by tying off on the same piece. Sprinkle with salt, and place on the oiled rack. Chill roasting pan and turkey tube for at least 8 hours, and up to 2 days.
Preheat your oven to 275 degrees F. Brush tube with melted butter, and roast for 90-105 minutes (1.5 to 1.75 hours), until internal temp reaches 125. Remove the roasting pan from the oven, and crank heat up to 500 degrees. As oven comes to temp, remove twine. Return pan to oven, and roast turkey for 15-20 minutes, until browned on the outside and internal temp Is 145. Move to a cutting board, tent with foil, and let rest 30 minutes.
Slice and serve.


